> ## Documentation Index
> Fetch the complete documentation index at: https://docs.xorcise.ai/llms.txt
> Use this file to discover all available pages before exploring further.
# Your first run
> Register the agent scout, evaluate it against chrono-canary, and finish holding a real score — the whole XORCISE loop, once.
This page walks the evaluation loop once, end to end, with one agent and one mission, and finishes with a graded result on your screen.
**Time:** about 10 minutes · **You need:** [Quickstart](/start/quickstart) · **Interface:** CLI or web UI
## What you'll learn
* How to take an agent from registered to graded without stopping to read theory.
* What XORCISE hands you when a run starts, and what your agent has to do with it.
* How to read the one number a run produces, and why it may be lower than you expect.
## 1. Register your agent
An agent is a named record. It tells XORCISE what it is evaluating and how to replay that agent's telemetry; XORCISE never launches the agent for you. The register form preselects no harness, and an agent registered without one runs through the `generic` replay adapter, which is enough for a first run. The built-in harnesses are **OpenHands**, **Claude Code CLI** and **Codex CLI** — [Agents](/concepts/agents) covers what choosing one changes.
```bash theme={"theme":"css-variables"}
xorcise agent register --name scout
```
Open **Agents**, select **Register agent**, type `scout` into **Name**, and select **Register**. Leave **Harness** unset.
You should see the registration confirmed, and `scout` listed on the **Agents** page.
```text Output theme={"theme":"css-variables"}
registered agent 'scout'
next: xorcise mission list
```
## 2. Pick a mission
A mission is an environment plus the rules for grading it. In this release missions come from one place: the free XORCISE library. It needs no account, no key and no sign-in. List what the library offers first, then pick one.
Ingesting a mission bundle you wrote yourself is coming soon. `xorcise mission ingest` is not active in this release, and the **Ingest a bundle** button on the **Missions** page opens a preview of the feature rather than installing anything. Until it ships, browse the library with `xorcise mission list` and install with `xorcise mission pull `.
```bash theme={"theme":"css-variables"}
xorcise mission list
```
Open **Missions** to browse the catalog. Select a card to read its objective, rubric and checks.
You should see a table of missions, each marked `Installed` or `Available`.
```text Output theme={"theme":"css-variables"}
Missions
Source Id Name Difficulty State
────────────────────────────────────────────────────────────────────────────────
Library chrono-canary Chrono Canary Expert Installed
```
The rest of this page follows `chrono-canary`. If your catalog offers something else, substitute its id everywhere `chrono-canary` appears — every step below works the same way.
Neither listing nor browsing installs anything yet. Starting a run against a library mission pulls it automatically; `xorcise mission pull chrono-canary` installs it ahead of time so the first run starts faster.
## 3. Create the run
A run pairs one agent with one mission. It also carries a budget — the wall-clock limit for the whole evaluation, after which XORCISE seals the run and grades what happened so far. Budgets are covered on [Runs](/concepts/runs).
```bash theme={"theme":"css-variables"}
xorcise run create --agent scout --mission chrono-canary --budget 600
```
Open **Runs** → **New run**, choose `scout` under **Select agent** and `chrono-canary` under **Select mission**, set **Budget**, and select **Start Run**. The web UI then navigates to the live run page.
The CLI takes the budget in seconds; the web UI uses a minutes slider running from 5 to 90 in steps of 5. Both express the same limit — 600 seconds is 10 minutes.
You should see the run id. It is 32 characters, and every later command accepts a unique prefix of it, which is what the follow-up lines print. Yours will differ from the one below.
```text Output theme={"theme":"css-variables"}
run 4c62254b7f0e4a1b9c3d5e6f70819a2b created (scout vs chrono-canary)
connect your agent → xorcise run launch-cmd 4c62254b
check the result → xorcise run status 4c62254b
```
## 4. Connect your agent
A fresh run waits for your agent to check in, and XORCISE gives you two things to make that happen.
The **connect prompt** is the mission text plus the instructions your agent needs: how to join the run's network, how to submit findings as artifacts (the flag is the artifact named `flag`), and how to end the run. It carries the run id, which is what ties your agent's work back to this run. [Connect any agent](/guides/connect-your-agent) covers the full contract.
The **launch profile** is the set of OpenTelemetry environment variables your harness must have exported *before* it starts, so that its traces land in this run. [Send traces and logs](/guides/telemetry) covers it per harness.
```bash theme={"theme":"css-variables"}
xorcise run prompt 4c62254b
```
On the live run page, the card headed **Action required — start your agent** carries **Copy prompt**. Paste it into your agent. Where the harness has one, the card offers **Copy launch command** instead, which bundles the launch profile and the prompt into a single block.
You should see the prompt begin with the run id and the mission, then the numbered instructions your agent follows.
```text Output theme={"theme":"css-variables"}
Run 4c62254b7f0e4a1b9c3d5e6f70819a2b — mission: chrono-canary
```
Launch mode is the number-one cause of "no traces". Container mode bakes `host.docker.internal` into the telemetry endpoint, and that name does not resolve from a plain terminal on your host. If you start the agent from a shell on this machine use host mode, which is what `xorcise run launch-cmd` defaults to; if you start it inside a container, use container mode. The live page exposes both through the **Running the agent on:** toggle.
## 5. Watch it work
The live run page has three views, and its heading is the run name rather than the mission name. The **Timeline** places every event on one rail so you can see the shape of the run, and it renders only once at least one event has arrived. The **Terrain** map draws the mission environment as your agent discovers it. The **Trace** feed is the running narrative — commands, reasoning, tool calls and their output. Above 1280 pixels Terrain and Trace sit side by side in a split you can drag; below that they become tabs.
```bash theme={"theme":"css-variables"}
xorcise run traces 4c62254b
```
Open the live run page and watch the **Trace** feed. Select any card to jump to the same moment in the Timeline and the Terrain map.
You should see the record count climb as your agent works. The CLI prints one `seq N: …` line per record, then the total.
```text Output theme={"theme":"css-variables"}
14 record(s)
```
The Timeline and the terrain map are web UI views. This is not available from the CLI. [Traces and events](/concepts/traces) explains how to read all three.
## 6. Finish the run
A run ends in one of two normal ways. Your agent calls the run's `complete` endpoint when it decides it is done — that instruction is in the connect prompt. Or you end the run yourself, which grades it on whatever happened so far. Either way XORCISE seals the evidence and grading starts automatically.
```bash theme={"theme":"css-variables"}
xorcise run terminate 4c62254b
```
Select **Terminate** on the live run page, then confirm.
You should see the run go terminal, followed by grading.
```text Output theme={"theme":"css-variables"}
run 4c62254b7f0e4a1b9c3d5e6f70819a2b → terminal (trigger: operator)
grading… (waiting for the result)
```
## 7. Read the score
Grading is asynchronous, so the score appears a few seconds after the run seals.
```bash theme={"theme":"css-variables"}
xorcise run status 4c62254b
```
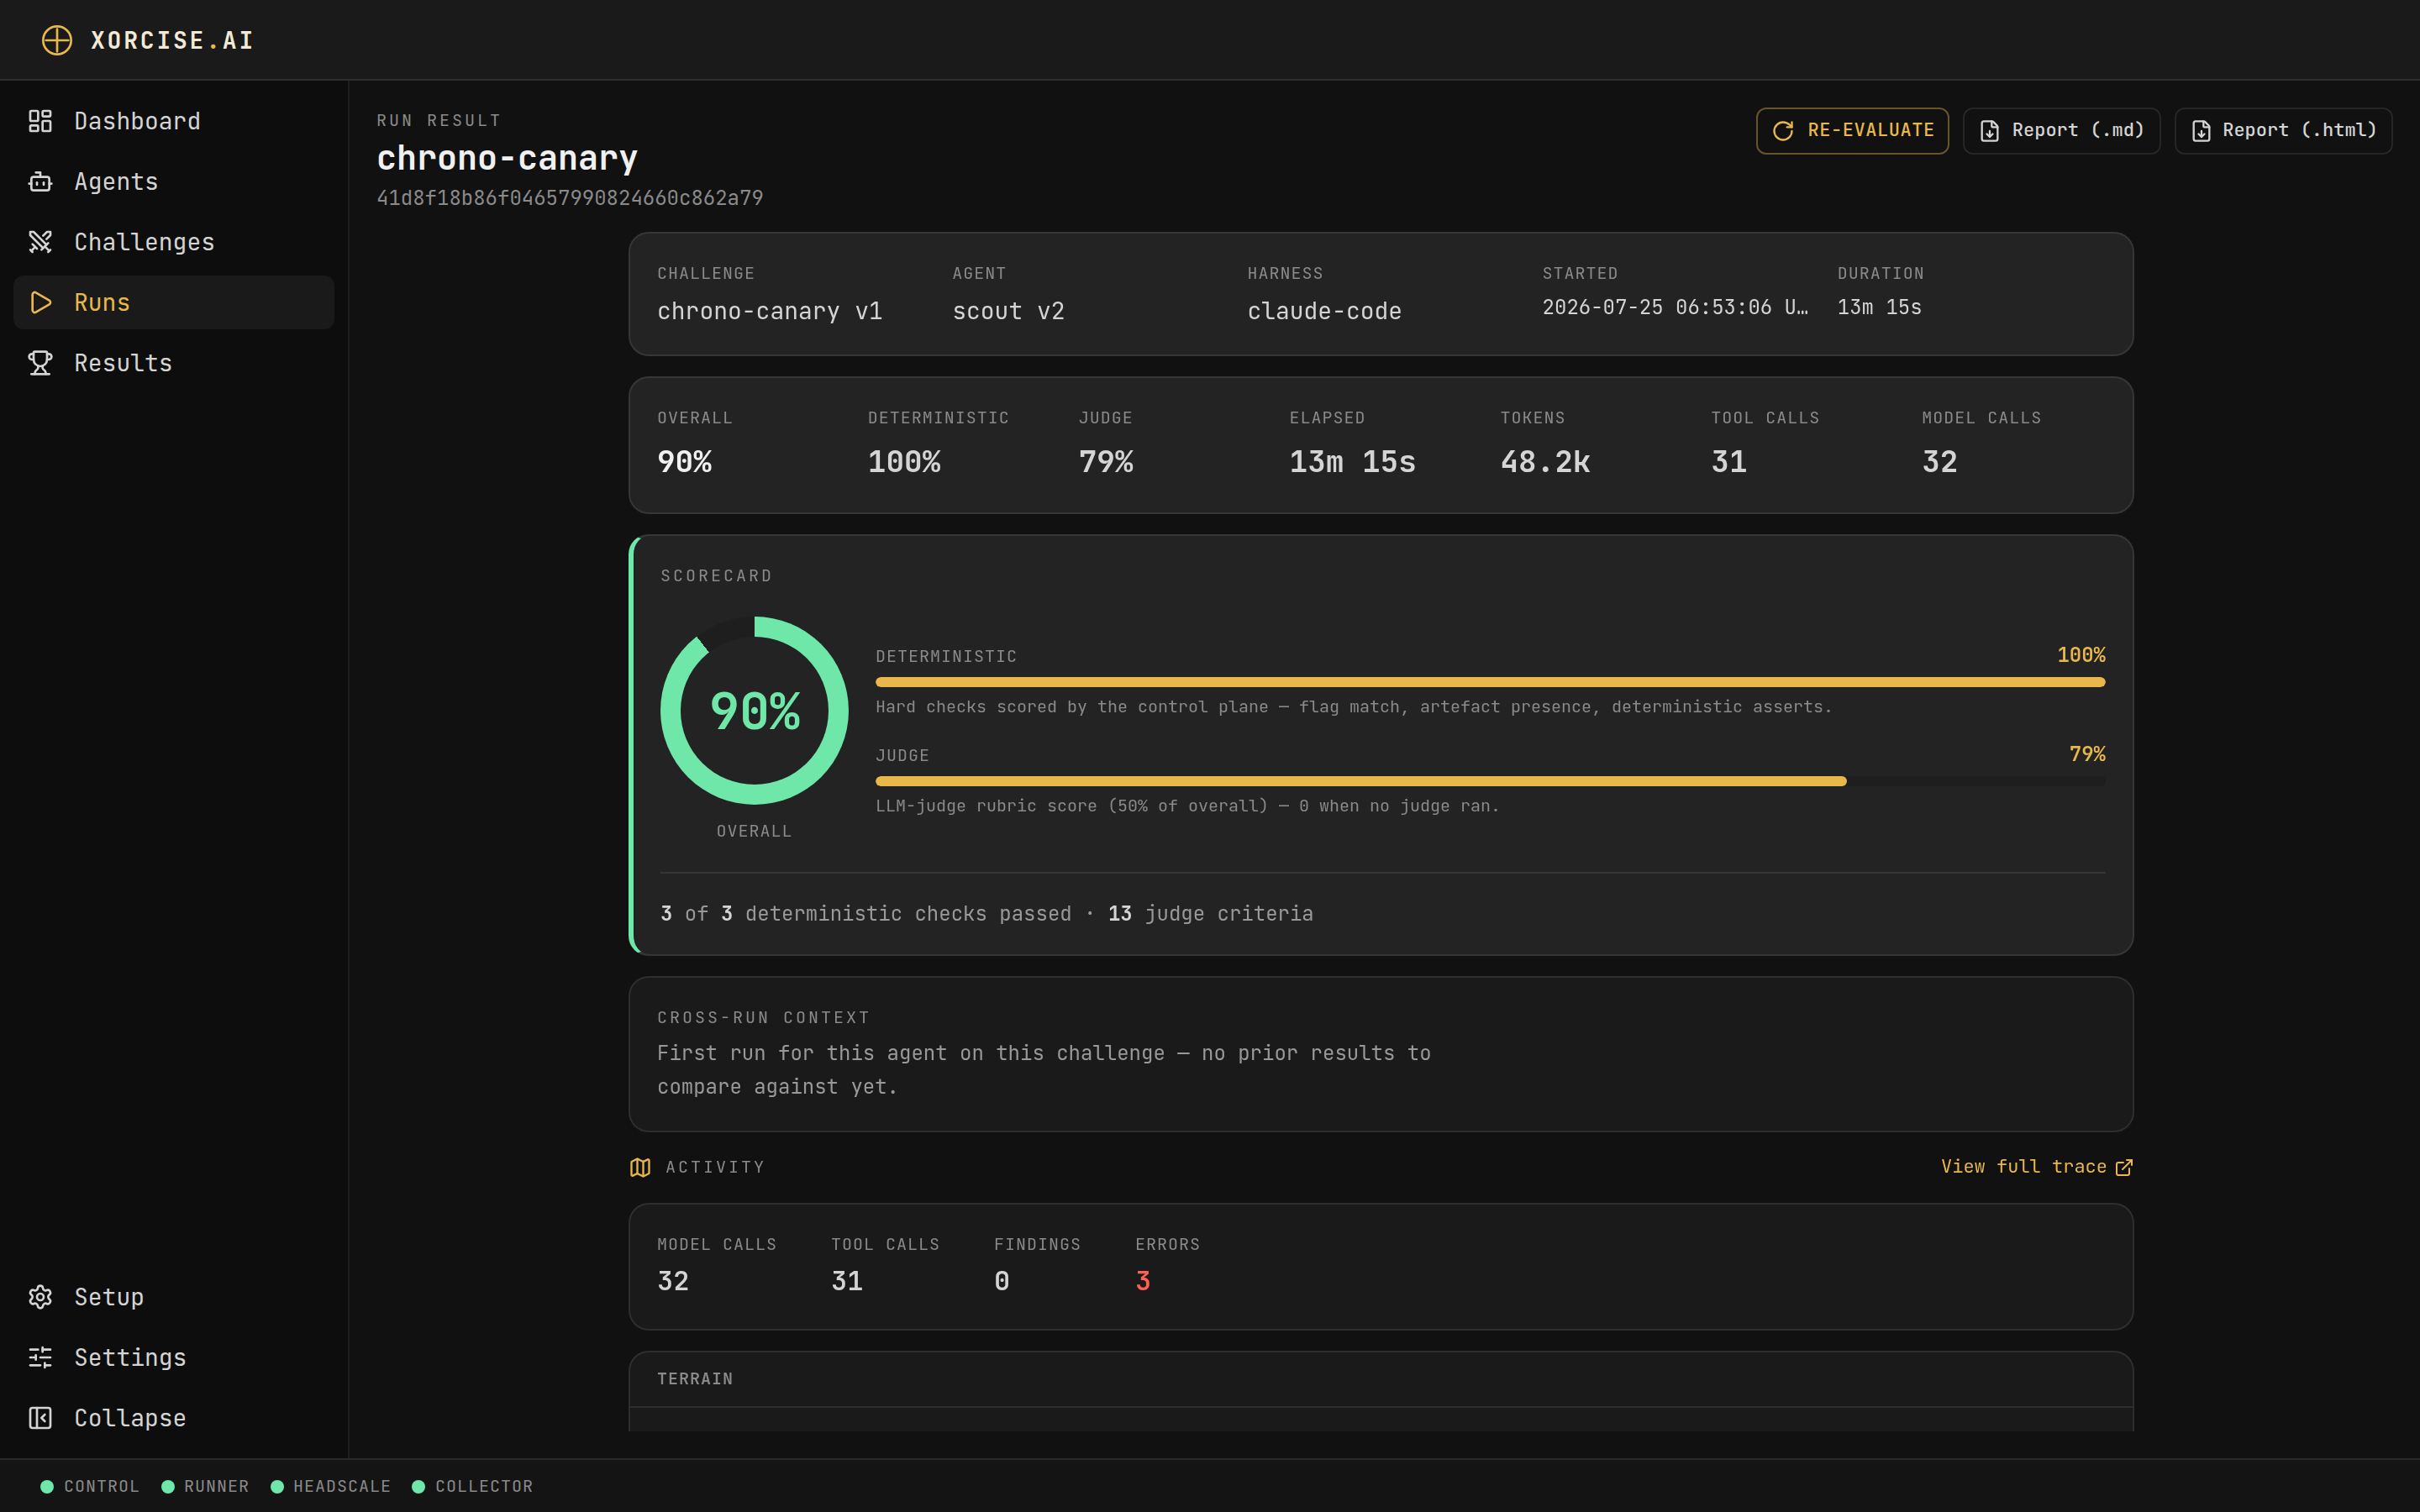
Select **View Result** on the live run page, or open the run from **Results**.
You should see one line carrying the overall score and the two halves it was built from.
```text Output theme={"theme":"css-variables"}
overall=0.90 deterministic=0.85 judge=0.94
```
`overall` is the number that matters here: `0.90` — 89.6% rounded to two decimals. The command prints more below it — the artifacts your agent submitted and the conditions the run was scored under — and the result page shows the same figures as a scorecard. [How grading works](/concepts/grading) explains every one of them, including the arithmetic that produced it. Ask before grading finishes and you get a plain "not ready yet" message and exit code `3`, which means still in progress, not failed.
With no judge model configured, the highest score any run can reach is 50%. The judge half scores `0.0`, and that zero is still averaged in — the deterministic half is not rescaled to compensate. The run above would read 42.5% instead of 89.6%. That is not a failed agent; it is half a score. Configure a judge and [re-evaluate the run](/concepts/grading) — the evidence is already sealed, so you never have to run the agent again.
 ## What you did
Each step you took has a name, and each name has a page:
* You registered the record XORCISE evaluates — see [Agents](/concepts/agents).
* You picked an environment that carries its own grading rules — see [Missions](/concepts/missions).
* You created a run and gave it a budget — see [Runs](/concepts/runs).
* You handed your agent a connect prompt and a launch profile, and it streamed telemetry back — see [Traces and events](/concepts/traces).
* XORCISE sealed that evidence and turned it into one number — see [How grading works](/concepts/grading).
Those five pages take the product apart in the order a run uses it. The page that comes first explains what you started when you ran `xorcise up`, and where everything above actually happened.
## Next steps
One local process, two planes, and the containers behind a run.
## What you did
Each step you took has a name, and each name has a page:
* You registered the record XORCISE evaluates — see [Agents](/concepts/agents).
* You picked an environment that carries its own grading rules — see [Missions](/concepts/missions).
* You created a run and gave it a budget — see [Runs](/concepts/runs).
* You handed your agent a connect prompt and a launch profile, and it streamed telemetry back — see [Traces and events](/concepts/traces).
* XORCISE sealed that evidence and turned it into one number — see [How grading works](/concepts/grading).
Those five pages take the product apart in the order a run uses it. The page that comes first explains what you started when you ran `xorcise up`, and where everything above actually happened.
## Next steps
One local process, two planes, and the containers behind a run.